Quantcast
Channel: Tutorials – China Gadgets Reviews
Viewing all 202 articles
Browse latest View live

Video: How to easily flash new stock firmware on Rikomagic MK68 TV Box

$
0
0

Rikomagic MK68 is a perfect fully equipped Mini PC with Android Lollipop 5.1 as operating system.

Rikomagic_MK68

Instructions
1. Download the latest stock firmware from here and extract the archive on your desktop.
2. Second, be ready to connect Rikomagic MK68 TV Box to your computer. Prepare an USB cable (male USB to male USB cable); insert one USB to computer USB port. Prepare also a thin metal stick; press the reset button from the bottom side, like in the video below. Don’t loose the stick, at same time, insert the second USB to the unit USB OTG port, in the rear side. After 3-5 seconds, loose the stick.
3. Install driver using RK Driver Assistant.
4. Burn the image with Rockchip Batch Tool v1.8 using ‘Restore’ button.

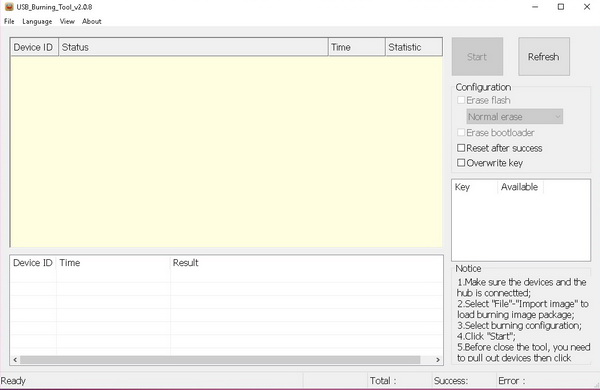
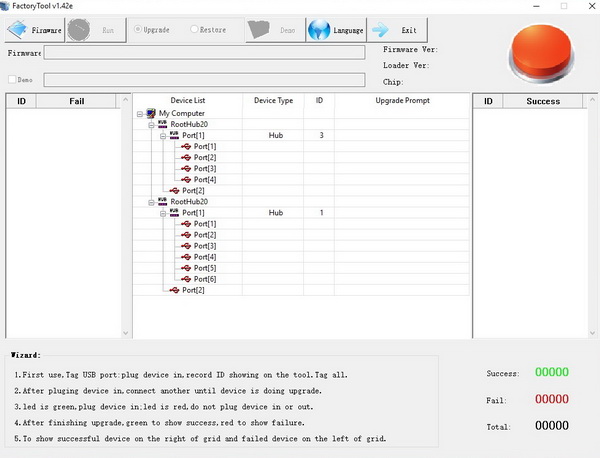
This process will take about 4 minutes, please wait patiently, during recovery/upgrade, don’t remove the USB cable and don’t power off during updating or recovering. First reboot of the unit after recovery/update will take more long time than usual, and even occur some lag issue, it’s normal since internal apk files need to be decompressed and occupy RAM, after 5 minutes, then system will be running well. So don’t worry about that.

Old firmware: Android Lollipop 5.1.1
Kernel version: 3.10.0
Build number: RKM MK68_ANDROID5.1.1-SDK-v1.00.00-20150824.1104

New firmware: Android Lollipop 5.1.1
Kernel version: 3.10.0
Build number: RKM MK68_ANDROID5.1.1-SDK-v1.00.00-20150909.1710


BTW, you can buy from here the Rikomagic MK68, the new Master of Android TV Boxes, for only US $103.90 with free shipping.


Please do not update firmware unless you know what you are doing, you really want it or it is absolutely necessary. Firmware updates may occasionally have bad results, like bricking your device, temporarily or permanently. The firmware update process is done entirely at your own risk. Before attempting to update the firmware, back up your data.


About Rikomagic
   
We were pioneers of the Android Mini PC concept and were the first Android Mini PC provider. Based in Shenzhen, China, Rikomagic aims to revolutionize the digital media player market. Our Research and Development team has extensive expertise in consumer electronics products and the development of network media players. Our core strength remains focussed around Android PCs and Android Mini PCs, where we have a great deal of experience. Rikomagic has been at the forefront of the development of multimedia, internet connected devices which truly transform TVs into home entertainment centers. The combination of our forward-looking market research, proven technological expertise and acumen, innovation, and our mature and efficient development process has given us industry-wide recognition. We differentiate ourselves by the quality, value and sophistication of our products. Our customers trust the RKM brand to enhance their entertainment experience, and we always strive to exceed their expectations. 

Did this article help you? If so, please tell me in a comment what do you think about it.

Don’t miss any of our future video tutorials, follow us on Youtube. Like us on Facebook. Add us in your circles on Google+. Watch our photo albums on Flickr. Subscribe now to our newsletter.

The post Video: How to easily flash new stock firmware on Rikomagic MK68 TV Box appeared first on China Gadgets Reviews.


Download DragonFace latest version v.2.2.5

$
0
0

Dragonface is a very intuitive piece of software that will let you edit and modify Allwinner firmware images.

Download_DragonFace


Dragonface is a very intuitive piece of software that will let you edit and modify A10, A20, A13, A30, A31, and A80 firmware images. You can quickly change your boot logo or animation; of course, you can do much more, pull, push and edit Init.rc or Script.fex, remove and add APK’s, change basic info.

Download DragonFace v.2.2.5 from here, here or here.
You can find the previous 2.2.3 version here.

Did this article help you? If so, please tell me in a comment what do you think about it.

The post Download DragonFace latest version v.2.2.5 appeared first on China Gadgets Reviews.

Video: How to easily update firmware on Zidoo X6 Pro RK3368 octa core TV Box

$
0
0

You can now buy Zidoo X6 Pro Android TV Box from www.geekbuying.com for only $89.99 with free shipping if you’ll use this coupon code: DVEIFSYZ.  (regular price:   $109.99).

Zidoo-X6-Pro

The Zidoo X6 Pro is Zidoo’s latest Android TV box powered by the Rockchip RK3368 processor. It also features 2GB of RAM, 16 GB of onboard storage, dual band WiFi and gigabit Ethernet. The Zidoo X6’s ports are located on the left and rear of the unit. On the side we’ve got 2 USB 2.0 ports and a micro SD card slot. The rear features a DC In port, composite video, gigabit Ethernet, HDMI out and optical audio out. Here you have the unboxing of this amazing device.

Tutorial on how to do Local update
First, you need to download the latest firmware from here and copy the firmware ZIDOO_X6_Pro_v1.0.19_ota.zip of local OTA upgrade on the U disk; then connect it to your BOX, findout the APK you want to upgrade from desktop: Settings>>About>>Update. You will find the following upgrade interface.

Zidoo-X6-Pro Zidoo-X6-Pro Zidoo-X6-Pro

You can findout your U disk through selecting the Local update, and findout the ZIP of OTA upgrade of you selected. After finishing the copy, you will allow to Update through the lower right corner.

Sure, you can also upgrade through online if there is the latest version onine.

When a new version pushed, system will pop up a dialog of upgrade when online, after the boot into the system about 30s, and show it on your screen; at this moment, you just need to press OK, it will automatically enter the interface of download the Update and download the zip of upgrade. Finishing downloading, it will start automatically updating when you select Update again(It also needs to keep turn on, and it will enter the system automatically after finishing upgrading.)

Please note again: DO NOT turn off your power during the process of upgrade, or you have to recover by flashing.

No go to Settings>>About>>Update>>OnlineUpdate. Congratulatons! It shows the latest version. The box came with v.1.0.15 firmware version and now it has v.1.0.19 firmware.

That’s all. You might have a try.

About Geekbuying GeekBuying.com was built to offer the coolest gadgets to the whole world at incredible low prices. And we have realized that online shopping has been very popular world widely but all the same story, sometimes kind of bored, lots of funs in real shopping are missing, so we’d like to add some new fun in online shopping to make the experience better. At GeekBuying, you will get fun in shopping. No matter you are a geek or not, you are sure to enjoy shopping at GeekBuying. We work passionately to exceed your expectations every time. Once You Buy, You Know.

Did this article help you? If so, please tell me in a comment what do you think about it.

Don’t miss any of our future video tutorials, follow us on Youtube. Like us on Facebook. Add us in your circles on Google+. Watch our photo albums on Flickr. Subscribe now to our newsletter.

The post Video: How to easily update firmware on Zidoo X6 Pro RK3368 octa core TV Box appeared first on China Gadgets Reviews.

Download FactoryTool by Rockchip v1.27

$
0
0

FactoryTool v1.27 for Rockchip devices

FactoryTool-by-Rockchip

Download FactoryTool by Rockchip v1.27 from here, here or here.

Download details
Archive: FactoryTool_Setup_V1.27_0831
Size: 2 MB
Archive content: FactoryTool_Setup_V1.27_0831.exe

Caution: Please do not update firmware unless you know what you are doing, you really want it or it is absolutely necessary. Firmware updates may occasionally have bad results, like bricking your device, temporarily or permanently. The firmware update process is done entirely at your own risk. Before attempting to update the firmware, back up your data.

Did this article help you? If so, please tell me in a comment what do you think about it.

The post Download FactoryTool by Rockchip v1.27 appeared first on China Gadgets Reviews.

Tutorial: How to easily flash latest stock firmware on No.1 S3 smartwatch

$
0
0

This is a simple tutorial on how to flash latest stock firmware on No.1 S3 smartwatch.

No.1_S3


Make sure to backup or write down the IMEI number (*#06#), after the upgrade you must rewrite IMEI number so that you can make direct calls from the watch.

BTW, you can now buy NO.1 S3 smartwatch from Gearbest.com for only $56.99 with free shipping. Visit product page here 

1. First, you’ll have to download the latest stock firmware archive 20150922 from here.

2. Install driver for the smart watch. Extract the archive and search ‘drive’ folder, run ‘InstallDriver.exe’ as Admin and install the drivers. I have Windows 10 Pro x64 and it worked with no problem at all.
3. Open “2502 firmware update tool” folder, double click “Flash_Tool.exe”, Check “Scatter/Config File”,then choose firmware update file, then check “Download”. After check “download”, connect S3 with computer, but make sure S3 is power off. During burning time, the data will keep updating, it is normal, don’t worry. (red line, yellow line, blue line and finally the green line). When green color line is displayed it means that the flashing was successful.

For more details please watch the video below.


Did this article help you? If so, please tell me in a comment what do you think about it.

Don’t miss any of our future video tutorials, follow us on Youtube. Like us on Facebook. Add us in your circles on Google+. Watch our photo albums on Flickr. Subscribe now to our newsletter. Biggest firmware download center.

The post Tutorial: How to easily flash latest stock firmware on No.1 S3 smartwatch appeared first on China Gadgets Reviews.

Download iRoot v.1.8.6.1

$
0
0

iRoot, formerly known as Vroot, is a free one click Android root tool. Just click one button, you can root your Android device immediately!

iroot

Download iRoot v.1.8.6.1 from here, here or here. Download previous version 1.8.5 from here.

Archive name: iRoot v1.8.6.1
Archive size: 17 MB
Content: vroot_1896350976_cid1000_7ba70783.exe
Model library Date: 150901

Changelog
Nov 5, 2015  V1.8.6
1. Support root Letv X500 and so so…
2. Increase the root success rate;
3. Fixed some bugs

iRoot is an easy-to-use tool. Enable the USB debugging mode, and connect your phone to the computer, then click the button “root” and now what you have to do is just waiting for the root result. Forget the complex and troublesome tutorials, everyone can control it easily.

iRoot’s goal is providing the excellent and simplest experience for all android users. The newest version of iRoot has supported more than 8000 Android devices. It is more effective, easier and faster than you can imagine.


Caution: Please do not update firmware unless you know what you are doing, you really want it or it is absolutely necessary. Firmware updates may occasionally have bad results, like bricking your device, temporarily or permanently. The firmware update process is done entirely at your own risk. Before attempting to update the firmware, back up your data.

Did this article help you? If so, please tell me in a comment what do you think about it.

Don’t miss any of our future video tutorials, follow us on Youtube. Like us on Facebook. Add us in your circles on Google+. Watch our photo albums on Flickr. Subscribe now to our newsletter.

The post Download iRoot v.1.8.6.1 appeared first on China Gadgets Reviews.

Download RK3xxx firmware tools v.5.78.35.00 by Sergio Poverony

$
0
0

Download RK3xxx firmware tools v.5.78.35.00 by Sergio Poverony from here, here or here.

1

You can download from here the previous versions:

– DriverInstaller_2014
– RK3xxx_firmware_tools_3.8.75.2
– RK3xxx_firmware_tools_4.0.02.00
– RK3xxx_firmware_tools_4.0.12.00
– RK3xxx_firmware_tools_4.0.33.00
– RK3xxx_firmware_tools_4.1.17.00
– RK3xxx_firmware_tools_4.1.22.00
– RK3xxx_firmware_tools_4.2.22.00


Did this article help you? If so, please tell me in a comment what do you think about it.

Don’t miss any of our future video tutorials, follow us on Youtube. Like us on Facebook. Add us in your circles on Google+. Watch our photo albums on Flickr. Subscribe now to our newsletter.

The post Download RK3xxx firmware tools v.5.78.35.00 by Sergio Poverony appeared first on China Gadgets Reviews.

RKM MK36S Windows 10 Mini PC Bios Settings

$
0
0

You can buy Rikomagic RKM MK36S Windows 10 Mini PC from Gearbest.com for only $122.15 with free shipping world wide. You can also buy it from Aliexpress.com

MK36S-bios
The AMI BIOS of Rikomagic MK36S Mini PC is one of the most complete among those available on Windows Mini PCs. It really has dozens of options not available on other products. You will find also an Android section. Here you’ll find a Video & Photo Gallery with unboxing of RKM MK36S Mini PC and here is the first run of the device. High resolution photo album here.

If you need it, I have made a back-up og Rikomagic MK36S Windows 10 Mini PC. You can download it from here, here or here. (2,82 MB).

I advise everyone to make a copy of a working BIOS, if possible, before doing BIOS experiments. To do that you can simple use the provided afuwin-5.05.04 software from the links above. If you disabled USB in the BIOS, or if you did another mess in device BIOS, only overwriting NVRAM can reset BIOS settings. In this way, there is no need to open the case, to teardown the device to be able to reset the CMOS. All the actions are made from Windows environment, so your Mini PC has to be able to boot into Windows. All the following actions that are you will do next are entirely at your own risk.

BIOS details
Archive name: Rikomagic MK36S BIOS back-up
Archive size: 2,82 MB
Archive content:  afuwin-5.05.04 (afuwin32 & afuwin64) & afuwin.rom
BIOS Vendor: American Megatrends
Core version: 5.011
Compliancy: UEFI 2.4, PI 1.3
Project version: 1ARXP 0.38 X64
Build Date and Time: 11/12/2015 23:19:41  
For flashing NVRAM:
1. Download the above archive. It is better to extract the content to the disk C.
2. Open as administrator Afuwingui.exe \afuwin\32\AfuWin32\Afuwingui.exe.
3. Open original backuped bios. Uncheck default ‘Main BIOS Image’ and check only NVRAM box. Press Flash. And best of all, start a command prompt as administrator and type, for example: C:\AfuWin32\afuwin.exe BIOS.rom /N
4. Press exit and restart the PC. After boot go into the BIOS and reset settings to default.


MK36S-bios

Did this article help you? If so, please tell me in a comment what do you think about it.

About Rikomagic We were pioneers of the Android Mini PC concept and were the first Android Mini PC provider. Based in Shenzhen, China, Rikomagic aims to revolutionize the digital media player market. Our Research and Development team has extensive expertise in consumer electronics products and the development of network media players. Our core strength remains focussed around Android PCs and Android Mini PCs, where we have a great deal of experience. Rikomagic has been at the forefront of the development of multimedia, internet connected devices which truly transform TVs into home entertainment centers. The combination of our forward-looking market research, proven technological expertise and acumen, innovation, and our mature and efficient development process has given us industry-wide recognition. We differentiate ourselves by the quality, value and sophistication of our products. Our customers trust the RKM brand to enhance their entertainment experience, and we always strive to exceed their expectations. 

Don’t miss any of our future video tutorials, follow us on Youtube. Like us on Facebook. Add us in your circles on Google+. Watch our photo albums on Flickr. Subscribe now to our newsletter.

The post RKM MK36S Windows 10 Mini PC Bios Settings appeared first on China Gadgets Reviews.


How to easily update fiirmware via OTA or from PC on Ugoos UT4 Android TV Box

$
0
0

Today we prepare new improvements and fixes pack for your UT4. This update comes with OTA or you can reflash manually using the method provided below.

ugoos-ut41. Install Guide – OTA Update
Search the new OTA update firmware from ‘Settings’ menu –> ‘About device’ –> ‘System update’ –> press ‘Check now’ button. Download the new update and install it. The device will reboot and enter into Recovery Mode to install the new update. The whole process will take a few minutes, so please be patient.

Firmware details
Firmware: Android Lollipop 5.1.1 OTA update
Old version: UGOOS_UT4_V0.0.3.b
New version: UGOOS_UT4_V1.0.0
Model: Ugoos UT4 Android TV Box
Platform: Rockchip RK3368
Old build number: UT4-userdebug 5.1.1 LMY48G eng.serega.20160205.104106 test-keys
New build number: UT4-userdebug 5.1.1 LMY48G eng.serega.20160325.150835 test-keys
Kernel version: 3.10.0

Changelog
1. Changed display format for CPU and RAM Info (Ugoos Settings). Added icons to status bar.
2. Network Usage information can be displayed in the status bar (Ugoos Settings).
3. Fixed bug display CPU load in status bar.
4. Fixed bug mount/unmount usb storages.
5. Added support multiple usb storages.
6. Now usb storages with one partition mounted without intermediate folders.
7. Added support exFAT file system.
8. Fixed bug reading/writing to usb storages on ntfs and ext file systems.
9. Fixed bug with sounds from AV output when turn on or reboot box.
10. Added screen rotation (Display Settings).
11. Fixed bug focus in Launcher3 when hide/show status and navigation bars.
12. Now the ability to switch users is available.
13. Added multi window mode (Display Settings).
14. Added ability to switch launcher with RC in Home Settings
15. Updated vpu and gpu libraries.
16. Updated UgoosLauncher to ver.1.1.
17. Updated RkVideoPlayer.
18. Added Ugoos version of Kodi player.
19. Other bug fixes.

2. Install Guide – Flash firmware from PC via USB cable
Download the latest firmware from this article. Extract the archive, run AndroidTool v2.3, go in the second tab ‘Upgrade Firmware’, press ‘Firmware’ button and select the right firmware image (ut4_1.0.0.img). For some reason you can’t burn this firmware with BatchTool 1.8 or FactoryTool_v1.39, you get ‘Load Firmware Failed!’ error. Next, connect Ugoos UT4 Android TV Box to your PC with USB cable, make sure to use ‘OTG’ port on the box. Press the ‘Recovery’ button and connect the power cord. ‘Found one LOADER device’ message will appear in AndroidTool; press ‘Upgrade’ button and wait 2-3 minutes untill you can read ‘Download Firmware Succes’ in the right windows.

Did this article help you? If so, please tell me in a comment what do you think about it.

Don’t miss any of our future video tutorials, follow us on Youtube. Like us on Facebook. Add us in your circles on Google+. Watch our photo albums on Flickr. Subscribe now to our newsletter.

The post How to easily update fiirmware via OTA or from PC on Ugoos UT4 Android TV Box appeared first on China Gadgets Reviews.

How to use ShareMe function on Mixcder ShareMe Pro Headphone

$
0
0

How to use ShareMe function on Mixcder ShareMe Pro Headphone. Visual comparison with previous model.

Mixcder ShareMe Pro

Mixcder ShareMe Pro Highlights: Superior Stereo Sound, Crystal-Clear Acoustics, Deep Bass High Fidelity, Unique ShareMe Function drom Mixcder, Comfortable & Super Light, Premium & Lightweight build, Long Battery Life & Dual Mode, Wireless Bluetooth 4.1. Here you can read the unboxing article of this great device.
BTW, you can buy Mixcder ShareMe Pro Bluetooth 4.1 Headphone from Amazon.co.uk for only £39.99 with free delivery in UK.

Share Me Function

Note: Touse this function you have to use 2 pairs of Mixcder ShareMe Pro Headphones.
ShareMe Pairing. Used for the first time, open two sets of headphones in the matching state at the same time, then two headsets automatically matching (the subordination relation will be random distribute automatically after pairing), then open the mobile device, and connect to the parent headphone.
The music or audio program will be shared among the two headphones and the Bluetooth-enabled device simultaneously.
1. Make sure the headphones and the connected Bluetooth-enabled device are turned off.
2. Do not place all devices more than one meter away from each other.
3. Press and hold the power buttons  located on each headphones for 5-6 seconds untill the LED flashes blue and red alternately, which means pairing mode.
4. The two headphones will pair each other automatically. Once sucessfully paired, one headphone voice will say ‘Connected, left channel’ and the LED flashes blue and red alternately, which means this is the primary headphone. The other headphone voice will say ‘Connected, right channel’ and the LED turns to solid blue, which means this is secondary headphone.
5. Start Bluetooth function on the device and select ‘Mixcder ShareMe Pro’ to pair with primary headphone.
6. Once successfully paired, the LED light turns into solid blue. You will hear ‘Pairing succesfully, second device connect’.

Visual comparison between Mixcder ShareMe Pro and previous model  Mixcder ShareMe7 Headphones.

Mixcder ShareMe7 Highlights: Brilliant ShareMe Technology, Strong Wireless Signal with Bluetooth 4.1 version, Foldable & Comfortable, Extra long playing time & Universally compatible with most Bluetooth-enabled phones and devices. Here you can read the unboxing article of this previous version.

High quality photo album here.


Mixcder ShareMe Pro Mixcder ShareMe Pro Mixcder ShareMe Pro img_3888 img_3890 img_3893 Mixcder ShareMe Pro Mixcder ShareMe Pro


Did this article help you? If so, please tell me in a comment what do you think about it.

Don’t miss any of our future video tutorials, follow us on Youtube. Like us on Facebook. Add us in your circles on Google+. Watch our photo albums on Flickr. Subscribe now to our newsletter.

The post How to use ShareMe function on Mixcder ShareMe Pro Headphone appeared first on China Gadgets Reviews.

Chuwi Hi10 Pro BIOS Settings Presentation

$
0
0

You can now buy Chuwi Hi10 Pro 2 in 1 Ultrabook Tablet PC from Gearbest.com for only 163.34 USD with free shipping world wide.

Chuwi Hi10 Pro

The Aption/AMI BIOS of Chuwi Hi10 Pro Tablet is one of the most complete among those available on Windows tablets. It really has dozens of options not available on other products. You will find also an Android section. Here you’ll find a Video & Photo Gallery with unboxing of Chuwi Hi10 Pro Tablet and here you can read the review of this amazing device.

If you need it, I have made a back-up of Cube iWork 10 Flagship Tablet BIOS. You can download it from here, here or here.

I advise everyone to make a copy of a working BIOS, if possible, before doing BIOS experiments. To do that you can simple use AfuWin64 software. If you disabled USB in the BIOS, or if you did another mess in device BIOS, only overwriting NVRAM can reset BIOS settings. In this way, there is no need to open the case, to teardown the device to be able to reset the CMOS. All the actions are made from Windows environment, so your tablet has to be able to boot into Windows. All the following actions that are you will do next are entirely at your own risk.

BIOS details
Archive name: Hi10 Pro Dualboot BIOS
Archive size: 6,62 MB
Bios filet: I1D6_C109S_Hi10Pro_201608051932.234
BIOS Vendor: American Megatrends (Aption / Ami)
Core version: 5.011 / 05.11
Compliancy: UEFI 2.4, PI 1.3
BIOS version: I1D6_C109S_Hi10Pro.234
Version: 2.17.1249
Build Date and Time: 08/05/2016 19:32:30

Did this article help you? If so, please tell me in a comment what do you think about it.

Don’t miss any of our future video tutorials, follow us on Youtube. Like us on Facebook. Add us in your circles on Google+. Watch our photo albums on Flickr. Subscribe now to our newsletter.

The post Chuwi Hi10 Pro BIOS Settings Presentation appeared first on China Gadgets Reviews.

Teclast X98 Plus II BIOS Settings Presentation. Download BIOS file from here!

$
0
0

Flash Sale Alert! You can now buy Teclast X98 Plus II Tablet PC from Gearbest.com for only 169.99 USD with free shipping world wide (regular price: 185.92).

bios

The Aption/AMI BIOS of Teclast X98 Plus II is almost the same like the one of Chuwi Hi10 Pro Tablet; it is one of the most complete among those available on Windows tablets. It really has dozens of options not available on other products. You will find also an Android section. Here you’ll find a Video & Photo Gallery with unboxing of Chuwi Hi10 Pro Tablet and here you can read the review of this amazing device.

If you need it, I have made a back-up of Teclast X98 Plus II BIOS. You can download it from here, here or here.

I advise everyone to make a copy of a working BIOS, if possible, before doing BIOS experiments. To do that you can simple use the provided Aptio AfuWin64 v.5.08.02.1189 software. If you disabled USB in the BIOS, or if you did another mess in device BIOS, only overwriting NVRAM can reset BIOS settings. In this way, there is no need to open the case, to teardown the device to be able to reset the CMOS. All the actions are made from Windows environment, so your tablet has to be able to boot into Windows. All the following actions that are you will do next are entirely at your own risk.

BIOS details
Archive name: Teclast X98 Plus II Dual Boot Bios
Archive size: 3.33 MB
Bios file: X98 Plus II Bios.rom
BIOS Vendor: Teclast
Core version: 5.011 / 05.11
Compliancy: UEFI 2.4, PI 1.3
BIOS version: tPAD 5.01
Version: 2.17.1249
Build Date and Time: 08/10/2016 15:25:28
Firmware ID: tPAD501
BIOS Chip Name: GigaDevice 25Q Series

img_06102016_100909 img_06102016_100923

Did this article help you? If so, please tell me in a comment what do you think about it.

Don’t miss any of our future video tutorials, follow us on Youtube. Like us on Facebook. Add us in your circles on Google+. Watch our photo albums on Flickr. Subscribe now to our newsletter.

The post Teclast X98 Plus II BIOS Settings Presentation. Download BIOS file from here! appeared first on China Gadgets Reviews.

Download from here Windows 10 drivers for Teclast X98 Plus II Tablet

$
0
0

Flash Sale Alert! You can now buy Teclast X98 Plus II Tablet PC from Gearbest.com for only 169.99 USD with free shipping world wide (regular price: 185.92).

Teclast X98 Plus II

Here you’ll find the unboxing of this great device. Teclast X98 Plus II BIOS Settings Presentation & Download BIOS file from here!

Teclast X98 Plus II Tablet came with Windows 10 Home 64bit edition version. This version is activated when enter online and everything is just ok. At first boot the C partition has 36.8 GB in size and 23.6 GB free space. All the drivers are correctly installed and untill now everything runs just great. The Intel Atom X5-Z8300 Cherry trail Processor is clocked at 1.44 GHz, according to Windows 10 OS. The tablet came with Windows 10 Home edition, version 1511 build 10586.218

Installed drivers for: Audio inputs and outputs, Batteries, Bluetooth, Computer, Disk drives, Display adapters, Firmware, Human Interface Devices, Imaging devices, Intel(R) Dynamic Platform and Thermal Framework, Keyboards, Monitors, Network adapters, Portable Devices, Ports (COM & LPT), Print queues, Processors, SD host adapters, Security devices, Sensors, Software devices, Sound, video and game controllers, Storage controllers, System devices & Universal Serial Bus controllers.

You can download Teclast X98 Plus II Tablet Windows 10 Drivers from here, here or here. (Teclast X98 Plus II Windows 10 Drivers Back-up / X98 Plus II 10-6-2016 6-54-24 AM.rar – 168 MB).  Use the provided Double Driver application (as Admin) to simply restore the missing drivers from your collection, just locate the extracted folder.

Teclast X98 Plus II  Teclast X98 Plus II Teclast X98 Plus II

Did this article help you? If so, please tell me in a comment what do you think about it.

Don’t miss any of our future video tutorials, follow us on Youtube. Like us on Facebook. Add us in your circles on Google+. Watch our photo albums on Flickr. Subscribe now to our newsletter.

The post Download from here Windows 10 drivers for Teclast X98 Plus II Tablet appeared first on China Gadgets Reviews.

Pipo X10 BIOS Settings Presentation. Download BIOS file from here!

$
0
0

You can now buy Pipo X10 Mini PC from Gearbest.com for 220.81 USD with free shipping world wide.

Pipo X10 BIOS

The Aption/AMI BIOS of Pipo X10 is one of the most complete among those available on Windows Mini PCs. It really has dozens of options not available on other products. You will find also an Android section. Here you’ll find a Video & Photo Gallery with unboxing of Pipo X10 Mini PC.

If you need it, I have made a back-up of Pipo X10 Windows only BIOS. I also added in the archive the Dual OS BIOS file too. You can download it from here, here or here.

I advise everyone to make a copy of a working BIOS, if possible, before doing BIOS experiments. To do that you can simple use the provided Aptio AfuWin64 v.5.08.02 software. If you disabled USB in the BIOS, or if you did another mess in device BIOS, only overwriting NVRAM can reset BIOS settings. In this way, there is no need to open the case, to teardown the device to be able to reset the CMOS. All the actions are made from Windows environment, so your tablet has to be able to boot into Windows. All the following actions that are you will do next are entirely at your own risk.

BIOS details
Archive name: Pipo X10 BIOS files
Archive size: 10.3 MB
Archive content: Aptio AfuWin64 v5.08.02, Pipo X10 BIOS Win10 only, X10双系统bios-TL_dual_PIPO_FLS108CHDN00_10000mA_3.7V_v009_160815 & X10双系统刷机方法
Bios file: Pipo X10 BIOS Win10 only.rom (Windows 10 only) & X10TL_dual_PIPO_FLS108CHDN00_10000mA_3.7V_v009_160815.bin (Dual boot Windows 10 & Anfroid Lollipop 5.1)
BIOS Vendor: American Megatrends
Core version: 5.011 / 05.11
Compliancy: UEFI 2.4, PI 1.3
Version: 2.17.1249
Build Date and Time: 07/13/2016 13:43:17
Firmware ID: X10TL901
BIOS Chip Name: Winbond 25X/Q Series

  Pipo X10 BIOS

Did this article help you? If so, please tell me in a comment what do you think about it.

Don’t miss any of our future video tutorials, follow us on Youtube. Like us on Facebook. Add us in your circles on Google+. Watch our photo albums on Flickr. Subscribe now to our newsletter.

The post Pipo X10 BIOS Settings Presentation. Download BIOS file from here! appeared first on China Gadgets Reviews.

Download Windows 10 Drivers for GPD WIN Gamepad Console

$
0
0

Windows 10 Drivers for GPD WIN Gamepad Console with Intel Atom X7 Z8700 CPU. BTW, you can buy GPD WIN Gamepad Console from Geekbuying.com for only $330 with free shipping world wide.

gpd-win-windows-10-gamepad

Download Windows 10 Drivers for GPD WIN Gamepad Console from here or here.

Firmware details
Archive name: GPD WIN drivers 20160928
Archive file size: 212 MB
Platform: Intel Atom X7 Z8700
Inside archive:  bluetooth – Win10_12.0.1.910_UART_x86-x64_Installer, Graphics, gsenser64 – kxaccel-1.0.28.2-x64-signed-autosfx,  PMIC, Audio, BM, DPTF, FlashUSBDriver, GPIO, GT9 windows driver-V1.3.2.0 for GPD, I2C, ISH, MBI, ModemResetDriver, SPI, TXEI, UART, WCE, wifi, 4356r2nvram, Install-drivers.bat

Installation guide
Enter “inf” folder, run “Install-drivers.bat” as adminitor, click “Yes” in pop-up windows.
Enter “exe/bluetooth” folder, double click and run “install.bat”.
Enter “exe/gsenser64” folder, double click and run “kxaccel-1.0.28.2-x64-signed-autosfx.exe”.
Enter “exe/PMIC” folder, right click “pmic.inf” and install it.
Open “Device manager”, choose ” Graphics driver”, right click “Update driver software”, specify to the Graphics folder for automatic installation, which needs few minutes.


Did this article help you? If so, please tell me in a comment what do you think about it.

Don’t miss any of our future video tutorials, follow us on Youtube. Like us on Facebook. Add us in your circles on Google+. Watch our photo albums on Flickr.

The post Download Windows 10 Drivers for GPD WIN Gamepad Console appeared first on China Gadgets Reviews.


Download Amlogic USB Burning Tool v2.0.8

$
0
0

You can use Amlogic USB Burning Tool to flash firmwares from a Windows PC to Android devices powered by Amlogic processors.

Amlogic USB Burning Tool

Download Amlogic USB Burning Tool v2.0.8 from here, here or here. Download previous version from here. Download Amlogic USB Burning Tool v2.0.5.15 from here.

How to use Amlogic USB Burning Tool
1. Download USB_Burning_Tool_v2.0.8_x86 (7.03 MB).
2. Extract the archive and run setup_v2.0.8.exe file to install the tool.
3. Start the USB_Burning_Tool.
4. Click on File->Import image and select your specific .img firmware for your Amlogic device.
5. Make sure that your Amlogic device is powered off, with the USB OTG port connected to your PC. Use a toothpick to press the recovery button, and power the device. The USB burning tool should automatically detect your device.
6. Now click on the ‘Start’ button button to proceed with the firmware update which should last several minutes.

Follow this video tutorial for more help.

Did this article help you? If so, please tell me in a comment what do you think about it.

Don’t miss any of our future video tutorials, follow us on Youtube. Like us on Facebook. Add us in your circles on Google+. Watch our photo albums on Flickr. Subscribe now to our newsletter.

The post Download Amlogic USB Burning Tool v2.0.8 appeared first on China Gadgets Reviews.

Download Rockchip FactoryTool v1.42e

$
0
0

Rockchip FactoryTool v1.42e is a tool specially designed for flashing firmware from PC on Rockchip devices.

Rockchip FactoryTool


Download Rockchip FactoryTool v1.42e from here, here or here. Download previous FactoryTool by Rockchip v1.27 from here. You can download Rockchip Firmware FactoryTool v5.0 from here.

Download details
Archive: FactoryTool-v1.42e
Size: 1.36 MB
Archive content: FactoryTool.exe

Wizard
1. First use, Tag USB port:plug device in, record ID showing on the tool. Tag all.
2. After pluging device in, connect another until device is doing upgrade.
3. led is green, plug device in; led is red, do not plug device in or out.
4. After finishing upgrade, green to show success, red to show failure.
5. To show successful device on the right of grid and failed device on the left of grid.

Caution: Please do not update firmware unless you know what you are doing, you really want it or it is absolutely necessary. Firmware updates may occasionally have bad results, like bricking your device, temporarily or permanently. The firmware update process is done entirely at your own risk. Before attempting to update the firmware, back up your data.

Did this article help you? If so, please tell me in a comment what do you think about it.

The post Download Rockchip FactoryTool v1.42e appeared first on China Gadgets Reviews.

How I managed to unbrick Hisense MA-317 SoundPad Media Station

$
0
0

A few days ago I played with my Hisense MA-317 SoundPad Media Station, I flashed a wrong firmware messing around with different bootloaders and I bricked it. BTW, here you can read about the unboxing Hisense MA-317 SoundPad Media Station.

unbrick

Everytime I tried to flash back the stock image,  even with ‘Found One LOADER device’ mode, I got always the same error: ‘Download Bot Fail!’, with blue square on the first position in Rockchip Batch Tool. ‘Switch’ button didn’t work neither.

Rockchip-Batch-Tool-error

1. The easiest way to solve this, without need of short circuit of the NAND pins, is to download and use Rockchip Create Upgrade Disk Tool v1.4 to make a bootable micro SD card with your device stock firmware, in my case I needed cts.ma317.2014.08.21 firmware (Android Jelly Bean 4.2.2) from here only to be able to access recovery menu from SD card. Rockchip Create Upgrade Disk Tool from here, here or here. Rockchip Create Upgrade Disk Tool v1.4 provided has SDBoot 2.13 and Rockchip Create Upgrade Disk Tool v1.5 provided use SDBoot 2.12 for Rockchip RK3028 / RK3026 devices. Use one of this tool to burn cts.ma317.2014.08.21.img file on a micro SD card, check only first box ‘Upgrade Firmware’, and make sure not to check ‘PCBA Test’ and ‘SD Boot’.  The key here is to use the correct firmware with the right boatloader / SDBoot. Insert the micro SD card into Hisense MA-317 SoundPad Media Station and power it on. You’ll see something like this:
unbrick unbrick
2. From this recovery menu you will be able to use option ‘apply update from ADB’. In this stage you need to download and install via ADB an OTA update.zip package, to restore damaged bootloader. So next you have to go here and download TEST-MA317E0911FRV03-MA317E0916FRV04-OTA.zip file (Android KitKat 4.4.4). Now download adb archive from here or here and extract de content to C: partition (C:\adb). Rename the firmware TEST-MA317E0911FRV03-MA317E0916FRV04-OTA.zip to update.zip for easier use and move it also to C:\adb folder. Plug in your device to your Windows machine. You will now be in stock recovery. With Volume Down, highlight “apply update from ADB.” Press Power to choose it. To test that you have adb up and running, and that your device is recognized open command prompt by running cmd-here.exe file and type the following: adb devices. You should get a serial number followed by ‘device’. If you see something along those lines, your adb is working properly, for now. Back to your PC, type the following command: adb sideload update.zip. If your adb is working properly, you should see the file transfer to your device in adb. Once that finishes, your device will begin to update. Once it has finished, simply reboot the device. Now we have the right recovery and the right KitKat bootloader on our device.
unbrick unbrick unbrick unbrick

3.  Download Rockchip Driver Assistant v4.4 from here and download Rockchip Batch Tool v1.8 from here. Run Rockchip Driver Assistant v4.4 and install the Windows drivers. Finally download MA317DEEWF2CV01.img firmware from here. Run Rockchip Batch Tool v1.8 and load MA317DEEWF2CV01.img file. Turn off Hisense MA-317 SoundPad Media Station, connect it to PC, press together Power On button + Volume Up button until you get a green square on Rockchip Batch Tool v1.8 and the press ‘Restore’ button to flash firmware. That’s all folks!

unbrick

Mentions:
– in my case, if I selected only ‘Upgrade firmware’ in Rockchip Create Upgrade Disk Tool, without ‘SD Boot’, the device refused to install firmware from SD card, but it booted into recovery.
– after flashing the first ‘update.zip’, my device didn’t boot normally, the display driver looks to be wrong, the image was blur and weird.
– it is possible like this tutorial to apply to all or to other Rockchip RK3028 / RK3026 or Rockchip devices in general. I don’t know that for sure. So if you got one of those errors or the blue square in Rockchip Batch Tools, then you can try this. Maybe it helps.

Enjoy, share is love!

My Hisense MA-317 SoundPad Media Station is back to life now!

To unbrick Rockchip RK3288 devices read this article. To unbrick Amlogic devices please read this article!

Did this article help you? If so, please tell me in a comment what do you think about it.

Don’t miss any of our future video tutorials, follow us on Youtube. Like us on Facebook. Add us in your circles on Google+. Watch our photo albums on Flickr. Subscribe now to our newsletter.

The post How I managed to unbrick Hisense MA-317 SoundPad Media Station appeared first on China Gadgets Reviews.

Download Amlogic USB Burning Tool v2.0.8

Download Rockchip FactoryTool v1.42e

Viewing all 202 articles
Browse latest View live